Showing posts with label paper. Show all posts

Tuesday, December 8, 2015

Gift Wrapping: Christmas 2015

I've been really busy at the store the last couple months.  I bought the yarn portion of a yarn and fabric store that was closing, so I spent much of October moving furniture, assembling displays, and unpacking boxes.  More on that in the next post!  In this post I want to talk about gift wrapping.

Many people don't know that all the gorgeous paper that I use for bookbinding can also be used as wrapping papers.  In fact, that is how these papers are marketed by the manufacturers.  This Christmas I decided to explore all the ways I could combine different papers and ribbons to have THE BEST wrapped gifts under the family Christmas tree.  (I am also giving fewer gifts this year, so I want to make them look extra special.)

 I started with some of the Christmas-specific papers.  My absolute favorite is the Fa-la-la Llama paper my paper source.  (It has puns and llamas, two of my favorite things!)  I paired it with a sheer red ribbon that looks darker any place it overlaps itself.  This is a fairly standard gift wrapping technique with a plain bow, but the silly paper and sheer ribbon really makes it stand out.  I wrapped another package in a red and white lokta paper from Paper Connection International.  This is another one where the patterned paper makes it stand out.  I could see using several papers in coordinating colors to to create a cohesive "look" under the tree.  And finally, a gift bag from Paper Source because sometimes you need a nice looking gift and don't have the time to wrap it.  Add some green tissue paper and you're done!

My next set of wrapped gifts used paper that is not specifically "Christmas wrap" for some interesting gifts that could be for Christmas, or any other gift giving occasion.  The red, green, and yellow paper is a 100% cotton paper from Black Ink.  I used a thin yellow ribbon and wrapped it around the corners to show off more of the paper's pattern, and tied a layered bow.  The package on the right is wrapped with an Italian paper that has script writing.  This one is all about the ribbon- a lovely hand dyed silk, with an oversized decorative key ornament tied into the bow.

For the last few gifts, I used Paper Source's plain rolls of red and green wrapping paper.  The plain paper is great because it is thicker than your average rolled wrapping paper, and it is solid colored on both sides, not just the front.  To make these gifts simple yet elegant, I tied them with contrasting silk dupioni ribbon from Midori.  The ribbon is two inches wide, and SO gorgeous.  Even a plain bow is just stunning!

I have so many gift wrapping ideas with this one.  I could see wrapping all the gifts in the same roll of plain wrapping paper, and tying a large bow around just one or two of the packages.  It would make your Christmas tree look like something out of a magazine!

Wednesday, October 7, 2015

Halloween Inspiration

In the last few weeks I have been doing some experimenting with new materials and was inspired to make some Halloween tags and backgrounds.  I have access to a photocopier again, so the first thing I did was blender pen image transfers!  The three images I used are cabinet cards from the store.  The transfer process is really easy:

1. Photocopy the image . I usually make multiple copies while I'm at the machine.
2. Cut out the image- this step is not necessary if the background of the image is white with no toner.
3. Place paper image side down on tag (or whatever you are transferring to.)
4. Color the paper with a blender pen that contains xylene to saturate the paper.  Do this in a well ventilated area.
5. Rub with a bone folder or other tool to make sure the entire image transfers.

I love using this technique for image transfers because it can be imperfect and unpredictable which lends an element of spooky-ness that is perfect for Halloween tags.  The old clothing and imperfect transfer brings to mind ghosts and haunted houses.  After doing the image transfers, I added color with Dylusions ink spray and Faber Castell Gelatos.  The Gelatos are still new to me, so this was a great chance to experiment with different techniques.  I mixed the gelatos with water in mini spray bottles to create my own color sprays, drew directly on the tags and blended the colors with a foam blending tool, used the gelatos with a waterbrush like paint...

Afterwards, I added washi tape and other embellishments.  The keys are tag board cut-outs from Coffee Break Design, and the "Boo" banners are my own creations.  Then I added some of my favorite ribbon in coordinating colors.

My other Halloween experiments used alcohol inks, stencils, and Golden Soft Gel in gloss.  I was inspired by the Tim Holtz tag tutorial for September.  I tried his method of dribbling different colors of alcohol inks and blender solution onto a craft mat and "swiping" the cardstock over the surface of the craft mat to get a unique background.  Then I applied the Golden gel over a spider web stencil to create a glossy raised image.  The Golden gel took a long time to dry, so I worked on these backgrounds over several days.  Later I added distress ink to darken the background, leaving the areas under the dried gel the original background color.

I tried this technique with Gelato backgrounds too and it worked great.  For the purple spider web in the upper right hand corner of the photo, I tinted some of the gel with a few drops of acrylic paint for a completely different look.  Overall, I had a lot of fun experimenting and got a few cute Halloween decorations out of it!

Friday, April 24, 2015

Collage Greeting Cards

 
It has been a busy few months getting the store set up, planning classes and workshops for the spring, and hosting a Grand Re-Opening Party.  I have fallen behind on several things like laundry, art projects, and blogging.  While I can't make any promises about the laundry, this week I have been getting back to the art and blogging parts

I am working on making collage greeting cards for my Kickstarter supporters.  The campaign I started to help fund Small Studio ended in December, and now I need to get my creativity flowing and make the rewards!  This is the start of the 140 cards I will be working on.

 
Sometimes collage is like a puzzle.  Start by gathering interesting papers, cutting out images, then piecing things together.  And when all else fails, I remember the wisdom of Portlandia and "put a bird on it."

Thursday, November 20, 2014

Fiber Rituals - Art Book 5/14

I finished this book in late September for an Art Books Cleveland exhibition.  The exhibition just ended, and I was finally able to take photos of the book.  The theme of the exhibition was rituals.  I thought about it for months, came up with several ideas, but never actually started anything... I kept getting distracted by spinning wool and dyeing yarn.  That is when I realized that my book should be about the rituals involved with fiber- the things I had become obsessed about this summer!

I came up with seven different rituals associated with wool, and illustrated each one of them.  Scouring, mordanting, dyeing, carding, spinning, plying, and knitting.  The whole book is only about 4 inches tall.

To make the cover, I dyed strips of kozo paper with leftover plant dyes.  Then I spun the paper into thread using a drop spindle, and knit it into a rectangle.  It was my first time spinning paper and using it for a book.  It is a little tricky to get a nice thread without breaking or tearing the paper.  Compared to spinning wool, it is almost easier because you don't need to worry about drafting the fibers, you just need to give the paper twist.

I know I am way behind on my 14 Art Books for 2014.  It has been an interesting year to say the least, with several big changes in my life.  I have two unfinished art books sitting in my studio, and the ideas/materials for at least three more...  Time to get back in my studio and do this!

Wednesday, March 12, 2014

Multiple Stick Book- Art Book 1/14

Remember back in January when I introduced my 14 Art Book in 2014 project?  Well, I finally got around to making my first art book of the year!  January and February were really tough months for me this year.  I had a lot of trouble getting motivated to do things, and spent most of the time curled up on the couch knitting.  (Which is why I have so many knitting posts lately...)  I'm also a competitive figure skater, so this is my peak training season before competition.  Between all of that I did not have time to physically make any art books... But I was planning!

This month I am really kicking things into gear with art books.  I have been invited to be part of a gallery exhibition of book and paper artists that opens in late April.  The artwork deadline is fast approaching and I only have one piece ready for the show!  Yikes!

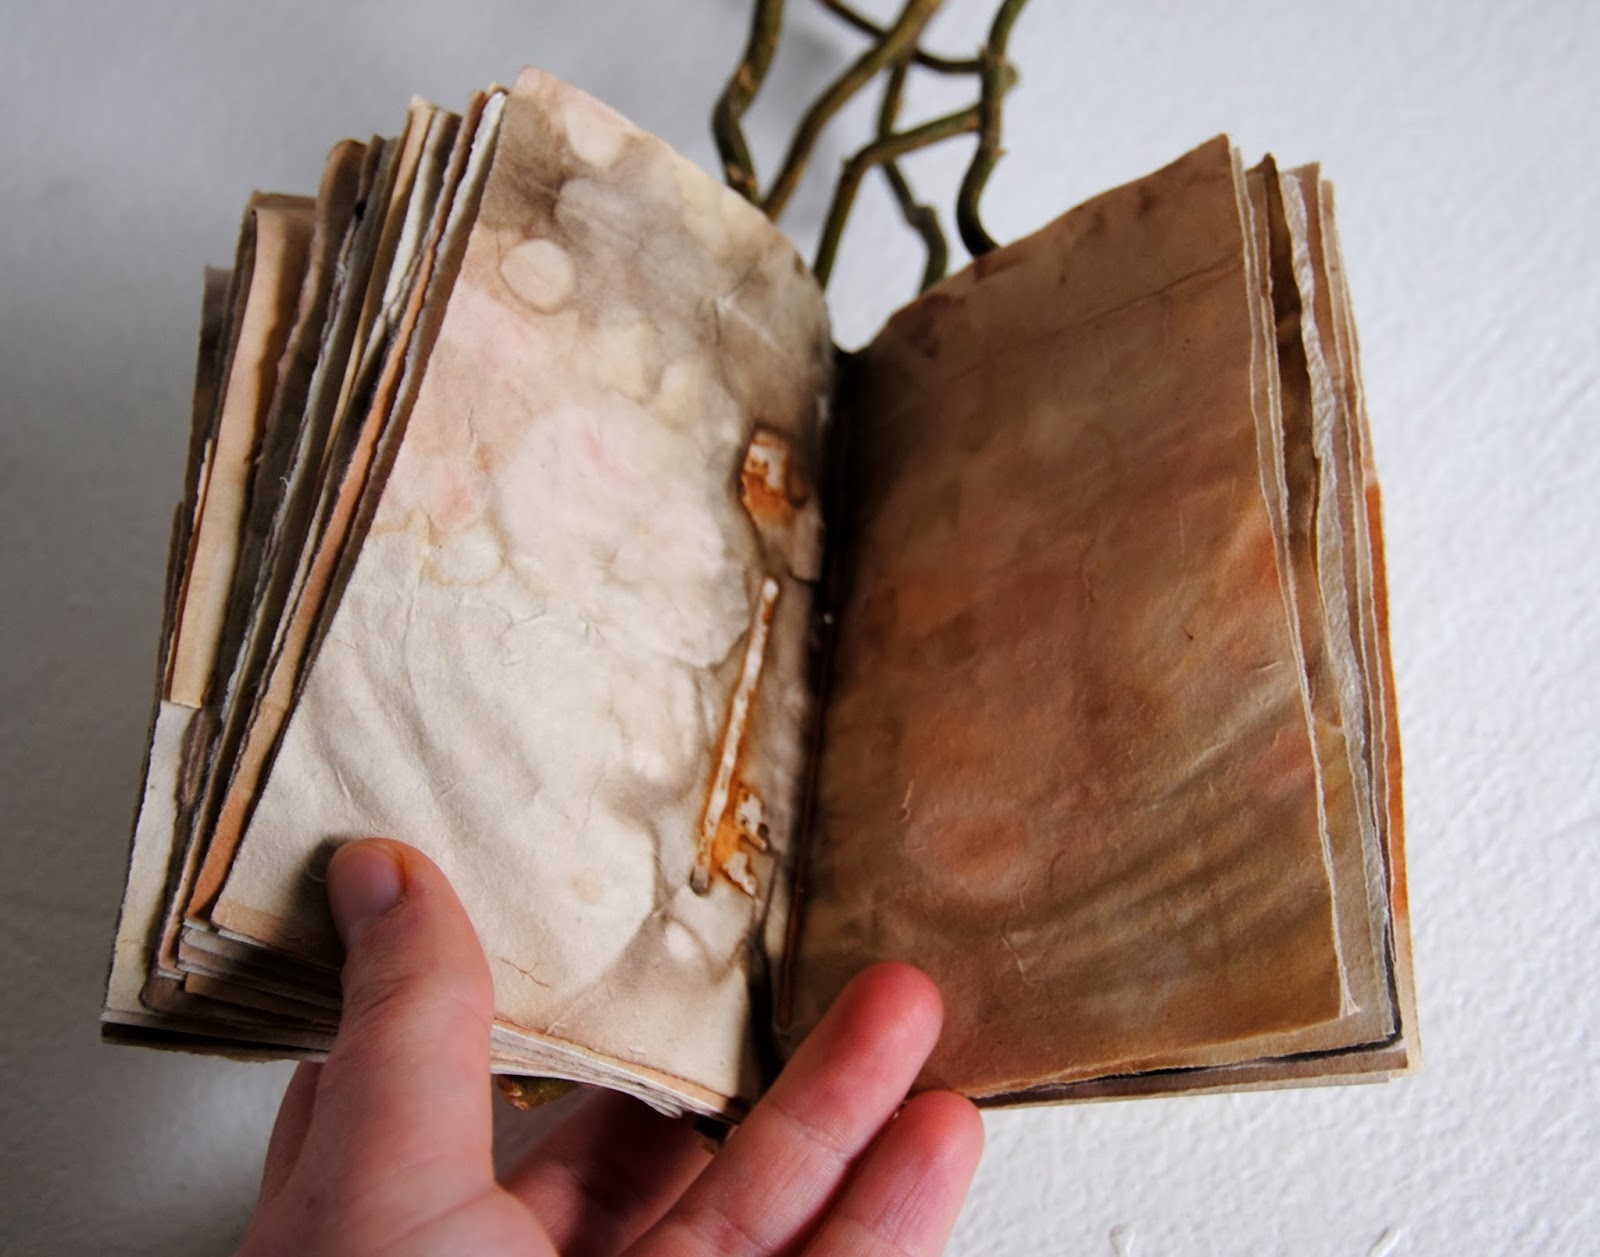
To get ready for the show, I made a list of pieces I already have and pieces I would like to create for the show.  I want to continue the two themes I've already started with my art books: curly willow branches with ecodyed papers, and Astronomy.  Last week I spent some time after work dyeing papers for future books.  On Monday I had the day off and spent most of the day in my studio.

http://www.flickr.com/photos/25370403@N08/13104976704/in/photostream/
I started by spraying down my new ecodyed papers with water and pressing them under weights to flatten.  I had two sheets of dyed paper from last fall that were already flat, so I used those for the first book.  Then I sorted through my stick collection and found some lovely, skinny, wavy ones.  The idea was to create a multiple signature stick book with one stick for each signature.

http://www.flickr.com/photos/25370403@N08/13104705335/in/photostream/
Once I had my 5 ideal sticks, I tore down the two sheets of dyed paper to 4 1/2 x 6 inch pieces.  I supplemented that with 5 sheets of handmade abaca paper that I made a few years ago.  Then I leafed through my old dictionary and cut out several botanical images for transfers.  Normally I use a blender pen to transfer images that have been through a copy machine, but this time I used the original image and rubbed very hard for a light transfer.  For the covers I used embroidery floss in complementing colors to sew together two smaller pieces of dyed paper.  (Two pieces for each cover.)

http://www.flickr.com/photos/25370403@N08/13104971464/in/photostream/
The hardest part about this book was sewing the signatures to the sticks.  It was tricky figuring out where to attach each stick and how to get the signatures connected securely without much wiggle.  I ended up just winging it, and I think it added to the organic look of the whole book.  I'm very excited with how the book came out, and I think I like it even better than my original Curly Willow Book!
http://www.flickr.com/photos/25370403@N08/13104969144/

Friday, October 25, 2013

Silent Auction Donation: Book 222

Every year the Morgan Conservatory does a silent auction as part of their annual benefit.  One part of the auction is called Snail Mail Paper Trail.  Each year for Snail Mail, the Morgan makes special paper and sends 2 sheets to artists across the country and around Cleveland.  Each artist makes a piece of artwork using the paper, and sends it back for the auction.

This year the papers were white and dark gray.  I made a coptic stitch journal using the white handmade paper for pages, robot decorative paper for the outside cover, gray handmade paper for the inside cover, and gray paper to cover the fold of each signature.

Friday, August 9, 2013

Ecodyeing: Paper and Yarn

July was a very busy month for me in terms of art. Basically, I've been making things faster than I could possibly blog about them! In an effort to catch up, I'm writing a bunch of blog posts this week about my recent projects.
As part of my job at the Morgan Conservatory I have the opportunity to meet many wonderful artists, specifically in the areas of paper, print, and book arts. One of the artists that came through recently was Velma Bolyard. She spent the weekend in Cleveland teaching a workshop on ecodyeing, and I was around to take pictures and watch the process. The workshop students layered plant material, paper, and occasionally pieces of metal, tied them up with string into bundles.  The prepared bundles get boiled in a large pot of water for several hours. The best part of the process is unwrapping the bundles and rinsing off the plant material to reveal the patterns and colors left behind by the plants.
I was around that weekend observing the process, and Velma encouraged me to make a couple bundles of my own. I used scraps of the cotton paper I usually use for book pages. The paper tore in a few places, but the results were still thrilling! I ended up using the dyed paper as part of an abstract art book.
While cleaning up after the workshop, there was still a large bag of Staghorn Sumac leftover. I took a gallon Ziploc full, and used it to dye yarn the next day.
I've dyed yarn before, but this was secondly the best end result. Mostly because the Sumac has natural tannins that act as a mordant for the yarn.
The fuzzy red bunches from the Sumac created a lovely brown dye bath (and actually smelled really nice while cooking.) I dyed one skein of white wool yarn, and a chunk of wool roving for spinning. The process took the whole day, but it was definitely worth it.
 

Thursday, June 27, 2013

Tutorial: Easy Folded Books

The weather has been pretty gloomy this week and I haven't had a chance to get good photos of my newest projects.  So instead of posting about books I've made, I am sharing an easy book tutorial I put together a while ago and never shared.  I wrote the instructions and took the photos for this book structure two summers ago while doing an internship at the Morgan Conservatory in Cleveland.  The plan was to publish a booklet with projects for kids.  That hasn't happened yet, so I thought I would share the instructions here!  (Feel free to link this tutorial on your own blog or pinterest, just make sure to credit me please.)

How to make a book from one piece of paper

First gather your materials and an eager crafter (this project is great for all ages, kids and adults!)  You will need a sheet of regular copy paper (recycled paper works great if it is blank on one side), scissors, a pencil, and materials for decorating and illustrating your finished book.


1.  Fold paper in half with the long edges together and crease.  Unfold and crease in the opposite direction.

2.  Fold in half with the short edges together and crease.  Unfold and crease in the opposite direction.

3.  Fold the short edges to the center fold line and crease.  Unfold both and crease in the opposite direction.

4.  You will now have 8 small rectangles with 10 creases separating them.  Find the two creases that do not touch the edges of the paper and trace over those lines with a pencil.

5.  Re-fold the paper in half with the short edges together.  Cut or tear along the pencil line.

6.  Hold the folded edges next to the cut line and bring them down to form an X shape with the paper.

7.  Gather the four sections together to form your book.

8.  Decorate and enjoy!

Friday, April 5, 2013

Bookbinding with High Schoolers

 
Today I had the opportunity to teach high school students bookbinding as part of a larger art project.  The school received a grant to do an artistic exchange program with a school in Montreal.  The project theme is "Equity and Diversity."  The students started by going to the Morgan Art of Papermaking Conservatory and Educational Foundation and learning how to make paper.
 
A few weeks later (that's today!) I delivered the handmade paper to the students, and walked them through a simple book structure.  The covers are cardboard from recycled boxes, with book cloth for the spine, and a single signature of handmade paper sewn to the book cloth.  The class periods were short, so I left step-by-step sewing instructions drawn on the whiteboard for next week.  After the books are completely assembled, the students are going to add content relating to the theme and send them to the students in Montreal.

During our bookbinding session, a reporter from the News Herald came by to write an article about the project and put together a video for their website.  Check out the article and the video here!

Monday, March 25, 2013

Women of Achievement Awards: Books 41-51


For the last few weeks I've been working on a large bookbinding commission.  I was asked by the Women's Center at Lakeland Community College to make this year's Women of Achievement Awards.  The award recognizes women that have made a difference in the lives of other women, and each year the award is created by a local female artist.  This year that was me!

I made 11 art books, one for each of the 10 recipients, and one for the Women's Center to display.  Each book has 3 signatures with a variety of decorative papers, handmade paper, and Mohawk superfine text weight paper.

To make each book individual and special for the award recipient, I selected passages from the nomination letters to incorporate in the book.  I also included in each book the definition of the word achievement.

As an added decorative element, I drew motifs from the decorative papers on some of the blank pages.  This helped to tie the whole book together and make it more of a keepsake item.

I was honored to be able to do this project for the Women's Center and participate in the awards ceremony on March 24th.  I had a chance to meet many of the award recipients and see my artwork on the program for the event.

Friday, February 8, 2013

Handmade Valentines- 2013 Edition

Snow is falling, Christmas is long gone, and everyone has gotten used to writing "2013" on their checks.  That means it is time for this year's handmade Valentines!

Ohio cards are some of my most popular handmade cards.  This year's Ohio Valentines are a bit on the Pirate side!  Ohio cards are available by request in any pattern or color I have.  Stop by the Urban Orchid in Ohio City or the Bazaar Bizarre Valentines Show to pick one up.