Thursday, August 22, 2013

Box Making with Steve Pittelkow

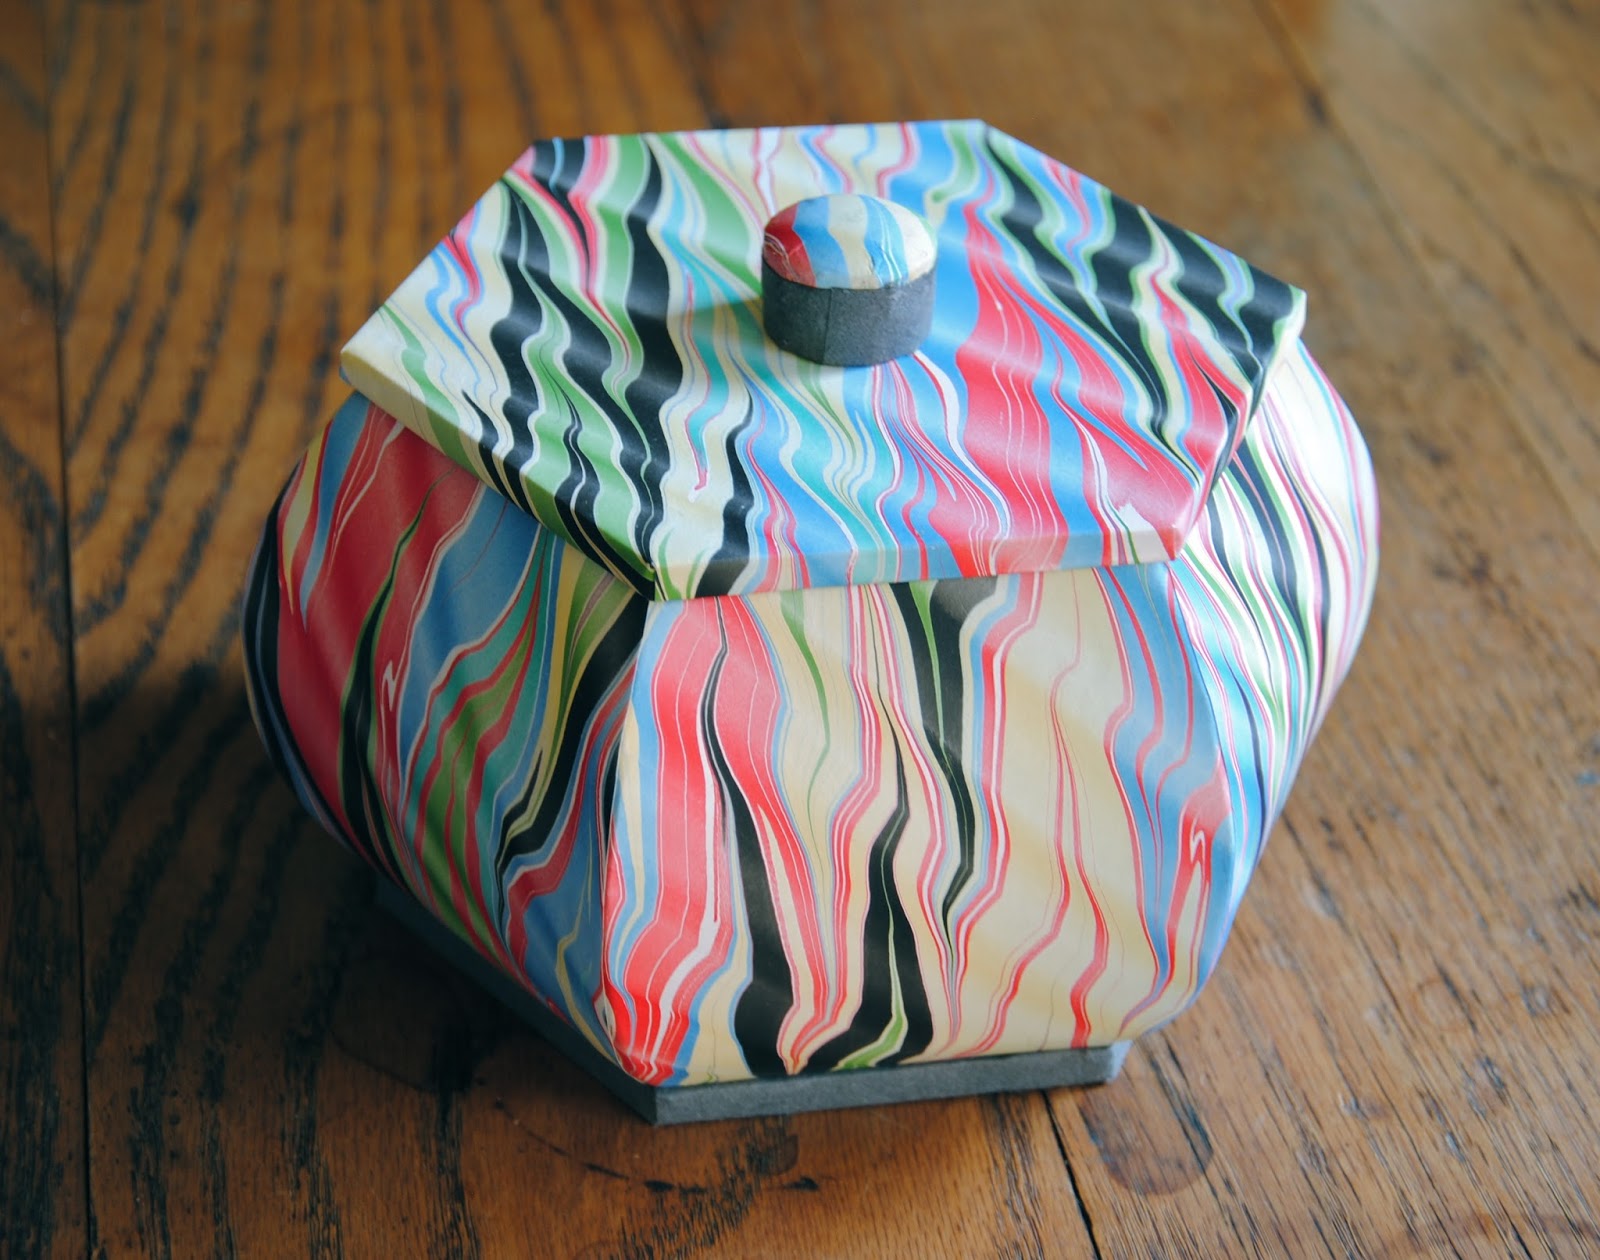
Back in July I took a box making workshop instructed by Steve Pittelkow.  During the class we made two different hexagonal boxes covered primarily in Steve's hand marbled papers.  I absolutely loved the class!  Box making requires precision, measuring, and repetition... three things I'm really good at!
The first day we made a box with three stacking trays that opens up similar to a jewelry box.  The first step was cutting out three hexagons out of board, leaving rectangular tabs on each flat edge for the tray sides.  Then we scored and folded up the sides of each tray and secured the corner edges with framers tape (also called paper tape.)  Each tray was covered with decorative paper like a book cover (only a little more complicated.)  The outside walls of the tray were covered first with a long strip of paper.  Then the inside bottom with a hexagon, and the outside bottom with another hexagon.  Last to be covered were the inside walls of the tray.  That process was repeated for all three trays and later the box lid.
After the trays were done, we created three "V" shapes out of board that matched the angle of the hexagon corners.  After a little fiddling we made the boards fit around the trays with enough space for hinges.  The trickiest part of the whole process was covering the V shaped boards with the same piece of paper, and folding over the edges.  The final step was attaching one tray to each segment of the box cover.

 On day two of the workshop we made hexagonal boxes with rounded walls, similar to a Chinese lantern or a pumpkin.  This box has a strong, hexagonal inner box and a thinner outer box with curved sides.  The thin pieces were cut individually from thin cardboard, and attached to a bottom hexagon like petals of a daisy.  Then we put the inner hexagonal box on the center of the daisy and bent each petal up so the top of the petal met with the top of the inner box.  The hardest part of this box was getting the curved edges to match up perfectly, and covering the seam with lots of tiny pieces of paper tape.

Once that part was done, it was just a matter of covering everything with decorative paper, and making a base and a lid.  I hope this post gave you a better idea of what goes into creating a box.  I am planning on taking a shorter box making workshop towards the end of September to learn more techniques for rectangular and square boxes.

Wednesday, August 14, 2013

Books 187-190

Last month I taught a mini private bookbinding workshop for a friend of mine.  Jane is part of my art book group but she hasn't learned how to make that many book structures.  She has a friend in town visiting for a few days, so we arranged a little book workshop for the two of them.
I taught Jane and her friend how to make a notebook with bookcloth on the outside and handmade paper for the pages.  First I showed them how to laminate decorative paper to a piece of bookcloth using PVA.  Next we created a single signature of handmade paper with the bookcloth/decorative paper piece on the outside.  The sewing was essentially a running stitch from the inside of the signature to the outside, move up one hole and back inside, all the way to the top and repeated back down through all the holes.  Finally, we used the guillotine to trim up the edges and finished the book by rounding the corners.
The demonstration book I made with Jane and her friend used miscellaneous paper from the "seconds" folder at work.  They were odd sheets in an assortment of colors.  Later that week I made three more books using different decorative papers and white cotton pages that were a little bit smaller.  The smaller books will be available at my fall and winter craft shows.

Sunday, August 11, 2013

Paradise Fibers Yarn Club: July

Last month I signed up for a year long yarn club through the yarn store Paradise Fibers.  Joining the yarn club means that every month Paradise Fibers will send me a mystery package with pretty new yarn and a knitting pattern.  As part of the deal, if I finish the project within a month and post it on Ravelry then I get $10 in store credit!

The first month of the club included a skein of Monarch by Mountain Colors in the color Harmony Aspen, and a pattern for a faux cabled mobius cowl.  I was SO excited to get the box in the mail and get started.  To make things even better, the yarn happened to be in my favorite colors.

It took me about 3 weeks to finish the project.  I had a lot of other things going on last month, so my knitting time was fairly limited.  The box for August should be arriving sometime this week!  I'll be sure to post about next month's project once it gets here.

Friday, August 9, 2013

Ecodyeing: Paper and Yarn

July was a very busy month for me in terms of art. Basically, I've been making things faster than I could possibly blog about them! In an effort to catch up, I'm writing a bunch of blog posts this week about my recent projects.
As part of my job at the Morgan Conservatory I have the opportunity to meet many wonderful artists, specifically in the areas of paper, print, and book arts. One of the artists that came through recently was Velma Bolyard. She spent the weekend in Cleveland teaching a workshop on ecodyeing, and I was around to take pictures and watch the process. The workshop students layered plant material, paper, and occasionally pieces of metal, tied them up with string into bundles.  The prepared bundles get boiled in a large pot of water for several hours. The best part of the process is unwrapping the bundles and rinsing off the plant material to reveal the patterns and colors left behind by the plants.
I was around that weekend observing the process, and Velma encouraged me to make a couple bundles of my own. I used scraps of the cotton paper I usually use for book pages. The paper tore in a few places, but the results were still thrilling! I ended up using the dyed paper as part of an abstract art book.
While cleaning up after the workshop, there was still a large bag of Staghorn Sumac leftover. I took a gallon Ziploc full, and used it to dye yarn the next day.
I've dyed yarn before, but this was secondly the best end result. Mostly because the Sumac has natural tannins that act as a mordant for the yarn.
The fuzzy red bunches from the Sumac created a lovely brown dye bath (and actually smelled really nice while cooking.) I dyed one skein of white wool yarn, and a chunk of wool roving for spinning. The process took the whole day, but it was definitely worth it.