Wednesday, May 25, 2011

Stacked Rocks

Another project I finished recently is this group of stacked rocks.  You might be asking yourself How does she get the rocks to balance so perfectly?  There is actually a brass rod through the middle of the stack.
 But how did you drill holes in the rocks???  Easy.  The "rocks" are actually ceramic and painted to look like rocks.  Gotcha.

Monday, May 23, 2011

Tea Cup Ring

This next jewelry project is a real head-turner!  I give you: the Tea Cup.  The cup and saucer are made of copper, the tea bag and ring are sterling silver, the water is resin, and the spoon is a sterling silver salt cellar spoon from an antique shop.  I think this one pretty much speaks for itself.

 And for everyone that has asked about purchasing the ring, this is one I'm keeping.  However, if you come across another salt cellar spoon I will gladly make you a ring of your own...

Special thanks go to my lovely hand model Alisha!

Tuesday, May 10, 2011

BW Student Art Exhibition

After the Senior Art Exhibition came down from the gallery, it was time for the Annual Student Art Exhibition.  Any student on campus is allowed to enter up to 5 pieces in the show, with a juror selecting the pieces to be displayed.  The juror also selects awards including 5 Honorable Mentions, first, second, and third prize, along with a Best in Show.  Additional awards are also given by the Academic Dean's Office and other groups.  The show ran from April 11-29 with a reception and awards ceremony on Friday, April 15th.


This year I had all 5 of my submissions selected to be in the show.  I entered two framed monoprints, an oil painting, a necklace, and a metal container.  My painting, titled Enter, was awarded an Honorable Mention.  Additionally, one of my prints and my necklace were purchased later in the month.


The necklace is a one of a kind piece created using a Euro coin and a gold toned pocket knife purchased at an antique store.  The coin is riveted between two pieces of copper and hangs from a handmade sterling silver chain.


My metal container is actually a Knitting Needle Case made from square brass tubing.  The lid of the box features a ceramic cash register found at an antique store.  The front of the box has glass cabachons set in silver and arranged to mimic the floral motif on the cash register.

Sunday, May 8, 2011

Happy Mother's Day!


To all the moms out there, happy Mother's Day!  This year, Mother's Day happens to fall on the same day as my college graduation (or perhaps I should say that my graduation happens to fall on Mother's Day...)  Either way, it will be a very special day and I am fortunate to be able to spend the day with my mother and both of my grandmothers.  To celebrate the occasion, I made some cards using some pretty pink paper from the DCWV 12x12 Lace and Linen Stack.  Enjoy the pictures!

Wednesday, May 4, 2011

Knit Mittens

I knit these mittens as a birthday present for a good friend.  By the time I finished them, they were a belated birthday present, and it was not cold enough to wear mittens anymore... But it is the thought that counts, right?

I used a free pattern from Ravelry.com that redirected me to the Balkan Style blog.  This style is called Newfoundland Mittens because it is the traditional mitten worn in Newfoundland.  The pattern uses rows of contrasting colors along with slipped stitches to create a textural honeycomb pattern.  Traditionally these mittens are worked with contrasting, but subdued colors.  I decided to go with bright purple and magenta for a more modern look.  I used Debbie Stoller's Full O' Sheep Yarn for this project, the same yarn I used for my Owl Hat a few months ago.

Sunday, May 1, 2011

Hard Ground Etching

After completing our explorations of monoprinting in my printmaking class, we ventured into the world of line etching.  The first process we explored is called hard ground.  The process starts by coating a zinc plate with a tar mixture and letting it dry.  When the ground dries it is hard, but fragile enough to chip or scratch through.  Then an image is scratched into the ground so the plate is exposed.  The plate is then put into an acid bath to etch the lines.  The etching process is typically done in multiple stages by scratching additional lines into the ground and then etching for half the time... and so on until all the etching is completed.  This creates some very dark lines, some very light lines, and some in the middle.

For my first hard ground plate I used a drawing I made while in Florence last year.  It shows the statues in the town square next to the Loggia of the Lancers.  I printed an edition of three for my project, as well as two Artist Proofs.  An edition consists of multiple prints off of the same plate, printed to look identical.

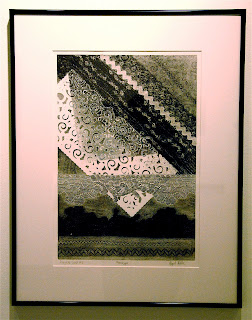
Artist Proofs, also known as AP, are unique prints made from a plate.  APs can be created by leaving extra ink on the plate before printing, hand coloring a completed print, using a mixture of colored inks, applying cut pieces of paper, etc.  The process I used for my APs is called chine colle.  After applying ink to the plate and preparing it for printing, cut pieces of paper are moistened, coated with wallpaper paste, and carefully placed on the plate glue side up.  The plate is then printed like usual.  The pieces of cut paper are adhered to the printing paper, and the image is printed on top.

Stay tuned for a post about another etching technique: soft ground!